 "navigation"


02
Content
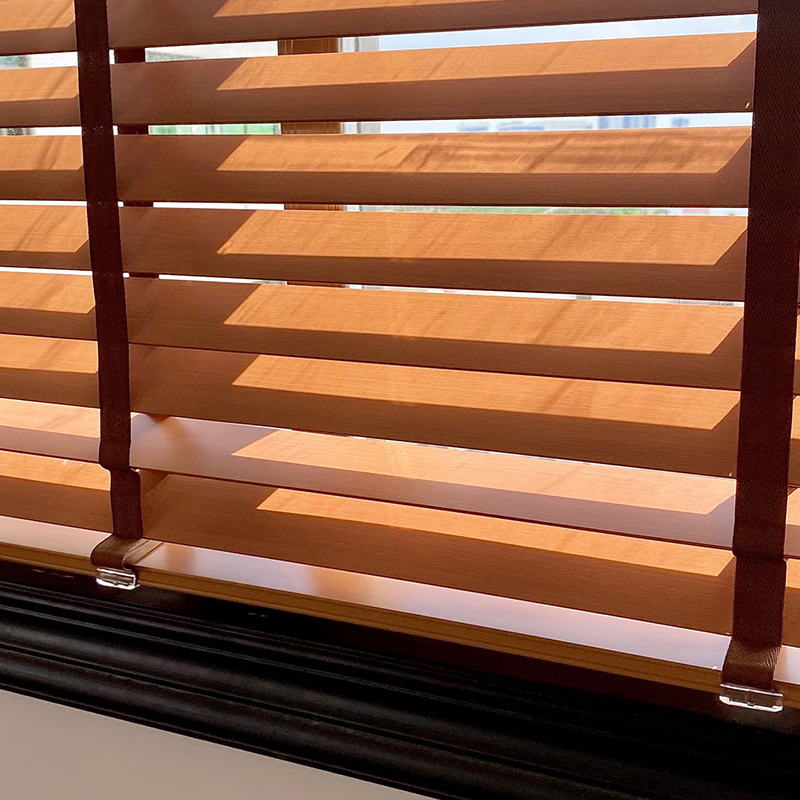
Ladder tape, also known as ladder cord or ladder webbing, serves as the foundational support structure for wood and faux wood blinds, holding the individual slats in precise horizontal alignment while allowing them to tilt and stack smoothly. This crucial component consists of two parallel vertical fabric strips connected by evenly spaced horizontal rungs that create a ladder-like appearance. The rungs cradle each blind slat, distributing weight evenly and maintaining consistent spacing between slats throughout the blind's operational life.
The cloth tape material used in quality ladder systems typically features polyester or cotton-polyester blends that resist stretching, fading, and wear from repeated tilting operations. Standard ladder tapes come in various widths ranging from one inch to two and a half inches, with wider tapes providing enhanced stability for heavier wood slats and narrower options suited for lighter faux wood materials. The color selection of ladder tape significantly impacts the blind's overall aesthetic, with neutral tones like white, cream, and tan remaining popular choices that complement most wood finishes and interior design schemes.
Understanding the relationship between ladder tape dimensions and blind functionality proves essential before beginning any measurement project. The rung spacing, which corresponds to the distance between blind slats, typically measures between three-eighths inch to one inch depending on slat width and manufacturer specifications. This spacing directly affects light control capabilities, privacy levels, and the overall appearance of the blind when fully lowered, making accurate measurement critical for replacement or repair projects.
Achieving precise measurements for ladder tape replacement requires assembling the proper tools and creating optimal working conditions before beginning the measurement process. A quality steel measuring tape with clear markings in both inches and fractions provides the accuracy needed for blind component measurements, superior to flexible fabric tapes that may stretch or cloth tapes that lack precision. A notepad or digital device for recording measurements, a pen or pencil, and adequate lighting ensure you capture and document all necessary dimensions without error.
Preparing the blind for measurement involves lowering it completely and ensuring all slats hang level and properly aligned within the existing ladder tape structure. Examining the current ladder tape condition helps identify wear patterns, stretching, or damage that may have affected the blind's operation, providing context for the measurements you will take. If the existing ladder tape has deteriorated significantly, measurements should account for potential distortion by checking against the headrail and bottomrail dimensions rather than relying solely on the damaged tape itself.
Creating a systematic approach to measurement prevents errors and ensures you collect all necessary information in a single session. Photographing the blind assembly before disassembly, particularly the ladder tape attachment points at the headrail and bottomrail, provides valuable reference material during reassembly. Laying out a clean, flat work surface protects the blind components during measurement and allows for careful examination of each element in the ladder tape system.
Determining the correct ladder tape length requires measuring from the attachment point at the headrail to the attachment point at the bottomrail, accounting for the specific mounting method used in your blind system. For blinds where ladder tape wraps around the headrail tilt mechanism, measure from the center of the headrail where the tape emerges to the bottomrail attachment, then add the wraparound distance which typically ranges from two to four inches depending on headrail diameter and tilt mechanism design.
The measurement technique varies slightly between different blind configurations, with route-less blinds requiring different considerations than traditional routed blinds. In route-less systems where slats are not notched for cord passage, the ladder tape bears more structural responsibility, making length precision particularly critical. Measure with the blind fully extended and all slats properly seated in their rungs, taking measurements along both the left and right ladder tapes separately as manufacturing tolerances sometimes create slight variations between the two sides.
Adding appropriate allowances to your base measurement ensures successful installation of replacement ladder tape without complications from insufficient length. Industry best practice recommends adding three to six inches to the measured length to accommodate attachment methods, potential adjustment during installation, and manufacturing variations. This extra length can be trimmed during final installation but insufficient length necessitates complete reordering, causing project delays and additional expense.
Ladder tape width directly influences the blind's stability, appearance, and operational smoothness, making accurate width measurement essential for functional replacement. Measure the width of the existing ladder tape at multiple points along its length using calipers or a precise ruler, as some tapes may have stretched or compressed over time. Standard widths include one inch for lightweight faux wood blinds with narrow slats, one and a half inches for medium-weight applications, and two inches or wider for heavy wood slats exceeding two inches in width.
Rung spacing measurement determines how slats will align and overlap when the blind is closed, affecting both privacy and light control performance. To measure rung spacing accurately, count the total number of slats in the blind, then measure the total distance spanned by the ladder tape rungs from the first to the last slat position. Dividing this total distance by the number of spaces between slats yields the precise rung spacing measurement. Cross-checking this calculation by measuring the distance between several individual rungs at different locations along the tape verifies accuracy and identifies any irregularities.
Slat thickness influences rung spacing selection, with thicker wood slats requiring slightly wider spacing to prevent binding during tilting operations while maintaining adequate overlap for privacy. Measuring slat thickness with calipers at the center point provides data for confirming that rung spacing complements the physical dimensions of your slats. This relationship becomes particularly important when upgrading from faux wood to genuine wood slats or vice versa, as the material change may necessitate adjustments to ladder tape specifications.
Partial ladder tape replacement addresses localized damage without requiring complete system replacement, offering a cost-effective repair solution when damage affects only specific sections. Measuring for partial replacement begins with identifying the exact location and extent of damage, marking these boundaries clearly on the existing tape structure. Extend your replacement measurement at least two rungs beyond the damaged area on both sides to ensure adequate overlap for secure splicing or connection to the remaining original tape.
Matching rung spacing becomes critically important in partial replacement scenarios where new tape must integrate seamlessly with existing sections. Measure the rung spacing in the undamaged portion of the original tape using the techniques described previously, taking multiple measurements to establish an average that accounts for any minor manufacturing variations. Document the exact position of each rung relative to the headrail or bottomrail, as this information guides proper alignment during installation of the replacement section.
Attachment point measurements for partial replacements require special attention to ensure the new section integrates properly with the blind's operating mechanism. Measure the distance from the damaged section to the nearest fixed attachment point, whether at the headrail, bottomrail, or intermediate connection point. These measurements determine whether the replacement section requires specific attachment hardware or can utilize existing connection points, influencing both the ordering specifications and installation approach.
| Mounting Type | Measurement Starting Point | Additional Length Needed | Special Considerations |
| Inside Mount | Headrail bottom edge | 3-4 inches | Account for bracket depth |
| Outside Mount | Headrail center | 4-6 inches | Extended headrail projection |
| Ceiling Mount | Tilt mechanism center | 5-7 inches | Longer wraparound needed |
| Decorative Valance | Below valance attachment | 2-3 inches | Valance clearance required |
Systematic documentation of ladder tape measurements prevents costly ordering errors and ensures you have complete information when purchasing replacement materials or consulting with blind repair professionals. Create a standardized measurement form that includes fields for overall length, ladder tape width, rung spacing, number of rungs, slat count, and any special features such as decorative tapes or colored components. Recording measurements for both left and right ladder tapes separately identifies any asymmetries that may affect ordering or installation procedures.
Verification through remeasurement provides confidence in the accuracy of your recorded dimensions before committing to material purchases. After completing your initial measurements, wait several hours or until the next day, then remeasure all critical dimensions independently without referencing your first set of measurements. Comparing the two measurement sets identifies discrepancies that require resolution through additional careful measurement, eliminating errors caused by misreading the measuring tape or transposing numbers during documentation.
Cross-referencing your measurements against manufacturer specifications for your specific blind model, when available, validates that your measurements fall within expected ranges for that product line. Manufacturer documentation often provides standard ladder tape specifications for different blind sizes, allowing comparison with your measured values. Significant deviations from these standards may indicate measurement errors, unusual customization in your blind, or deterioration that has altered original dimensions, all factors requiring investigation before proceeding with replacement material orders.
Measuring stretched or sagging ladder tape represents one of the most frequent errors that leads to incorrect replacement specifications and installation difficulties. Ladder tape that has stretched from years of use or moisture exposure no longer reflects the original manufactured dimensions, causing measurements based on the deteriorated tape to produce replacement orders that may be too long or have improper rung spacing. Avoiding this error requires recognizing signs of stretching, such as uneven gaps between slats or sagging sections, and adjusting measurements by comparing against the rigid headrail and bottomrail dimensions rather than the compromised tape itself.
Failing to account for attachment method variations creates measurement inaccuracies that become apparent only during installation attempts. Different blind manufacturers employ various techniques for securing ladder tape to headrails and bottomrails, including stapling, routing through channels, wrapping around drums, or clipping into specialized holders. Each method requires different length allowances, making it essential to carefully examine and document the existing attachment configuration before finalizing length measurements. Photographing these attachment points from multiple angles provides valuable reference material that clarifies appropriate allowances.
Ignoring the relationship between slat width and rung spacing leads to functional problems even when linear measurements prove accurate. The rung spacing must provide adequate support for the specific slat width while allowing proper overlap for privacy and light control. As a general principle, rung spacing should fall within the range of one-quarter to one-third of the slat width for optimal performance. Measuring and recording both slat width and existing rung spacing enables verification that these proportions align with best practices, identifying situations where the original installation may have used non-standard specifications requiring replication.
Armed with accurate measurements, selecting appropriate replacement ladder tape involves matching your specifications to available product options while considering quality, color, and compatibility factors. Supplier catalogs typically organize ladder tape by width first, then by rung spacing increments, allowing you to narrow options quickly based on your primary measurements. Premium ladder tapes feature reinforced stitching at rung attachment points, fade-resistant dyes, and moisture-resistant treatments that extend service life beyond economy alternatives, justifying higher initial costs through improved durability and performance.
Color matching considerations extend beyond simple aesthetic preferences, as ladder tape color significantly impacts the blind's visual appearance and effectiveness at different slat angles. Neutral tones like white, ivory, and beige minimize visual prominence when slats are tilted open, while matching the ladder tape color to the slat finish creates a more cohesive appearance when the blind is closed. Obtaining physical color samples before ordering large quantities ensures the selected tape color harmonizes with your specific wood or faux wood finish under your room's lighting conditions.
Custom ladder tape fabrication becomes necessary when measurements fall outside standard manufactured sizes or when replacing ladder tape for antique, imported, or custom blinds with unique specifications. Many blind component suppliers offer custom ladder tape services that manufacture to your exact specifications, though minimum order quantities and extended lead times typically apply. Providing precise measurements, clear specification documentation, and physical samples of the existing ladder tape when possible ensures custom fabricated tape meets your requirements perfectly, eliminating trial and error ordering of standard sizes that may not fit properly.


