 "navigation"


02
Content
Window blinds are one of those household fixtures that accumulate dust, grease, and grime steadily — yet rarely get the attention they need until the buildup becomes obvious. The challenge with cleaning blinds quickly is that the wrong technique for the wrong material can cause warping, shrinkage, fraying, or permanent staining. Vertical fabric blinds, in particular, require a more careful approach than hard slat blinds, as their woven or non-woven textile surfaces respond differently to moisture and mechanical cleaning. This guide covers fast, practical cleaning methods for all common blind types, with detailed focus on how to clean vertical fabric blinds effectively without removing them from the track.
Before reaching for a cloth or spray bottle, identifying what your blinds are made from is essential. The same cleaning approach that works perfectly on aluminium Venetian blinds can permanently damage vertical fabric blinds — and vice versa. Using excessive moisture on fabric vanes can cause shrinkage or water staining, while dry dusting alone won't remove the greasy kitchen film that builds up on hard slat blinds near cooking areas.
| Blind Type | Material | Best Quick-Clean Method | Water Safe? |
| Vertical Fabric Blinds | Woven / non-woven textile | Vacuuming + spot cleaning | Limited — damp only |
| Aluminium Venetian Blinds | Metal slats | Damp wipe with microfibre | Yes |
| Faux Wood / PVC Blinds | PVC / composite | Damp wipe or spray clean | Yes |
| Real Wood Blinds | Hardwood slats | Dry dusting only | No — warps easily |
| Roller Fabric Blinds | Coated or uncoated fabric | Spot cleaning + vacuuming | Coated: damp. Uncoated: dry |
Understanding this matrix before you begin saves time, prevents damage, and ensures the method you use actually removes the dirt rather than just spreading it around or embedding it deeper into the material.
For hard-surface blinds — aluminium Venetians, faux wood, or PVC verticals — the fastest cleaning method that actually works is the two-glove microfibre technique. Put on a pair of microfibre gloves (or wrap microfibre cloths around both hands), dampen them lightly with a solution of warm water and a small amount of dish soap, then run your fingers along both sides of each slat simultaneously. This cleans both surfaces in a single pass and takes only a few seconds per slat. For a standard 90 cm wide Venetian blind, a full clean using this method takes under five minutes.
For blinds in kitchen areas where grease residue has built up, add a small amount of white vinegar to your cleaning solution — a ratio of one part vinegar to four parts warm water effectively cuts through cooking grease without leaving a residue or damaging the slat finish. Wipe each slat from the centre outward to avoid pushing grime toward the cords or headrail. Follow with a dry cloth pass to prevent water spotting, which is particularly visible on aluminium surfaces.
For regular light-maintenance cleaning between deeper cleans, a vacuum cleaner with a soft brush attachment is the fastest tool available. Close the slats to a flat horizontal position, run the vacuum brush attachment along the surface from top to bottom, then rotate the slats to the opposite position and repeat on the other side. This takes under two minutes for most blinds and prevents dust from accumulating to the point where wet cleaning becomes necessary. A dryer sheet wiped along hard slat surfaces after dusting adds an anti-static layer that slows future dust adhesion — a simple trick that meaningfully extends the time between cleaning sessions.
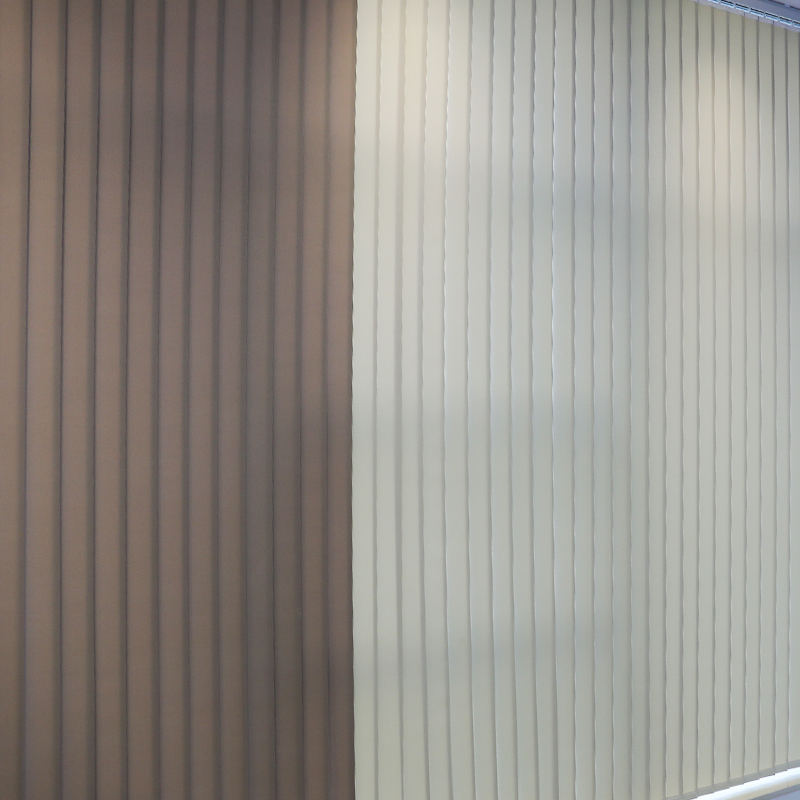
Vertical fabric blinds — with their long textile vanes hanging from a top track — are the most commonly mishandled blind type when it comes to cleaning. Many homeowners assume they need to remove the vanes and wash them in a machine, which is time-consuming and risks damage to the hanging clips or the fabric itself. In most cases, a thorough clean can be achieved without taking the blinds down at all, provided the right method and tools are used.
Start by closing the vertical fabric vanes so they hang flat and parallel, facing one direction. Using a vacuum cleaner with the upholstery brush attachment (not the hard floor head), run the brush gently from the top of each vane to the bottom in a single slow stroke, applying only light pressure. Fabric vanes are delicate — pressing too hard can distort the weave or leave impression marks. Once the front side is done, rotate the vanes 180 degrees using the control chain so they face the other direction and repeat on the reverse side. This step removes the bulk of surface dust and loose debris without introducing any moisture.
After vacuuming, inspect each vane for visible marks, spots, or staining. For general grime and fingerprints, dampen a clean white cloth with cold water and add a very small amount of mild fabric detergent — less than you think you need. Blot the stained area gently from the outer edge of the mark inward; never rub, as rubbing spreads the stain and can permanently distort the fabric weave. Use a second clean damp cloth to blot away any soap residue, then a dry cloth to absorb remaining moisture. Allow the vane to air dry completely before rotating it closed.
For more stubborn marks such as ink, crayon, or food, a small amount of rubbing alcohol on a cotton pad — blotted, not rubbed — is effective on most synthetic fabric vanes. Always test any cleaning solution on an inconspicuous area of the vane first, ideally near the bottom edge, and wait a few minutes to confirm no discolouration or texture change occurs before treating the visible stain.
For vertical fabric blinds that need a deeper clean than spot treatment allows, a handheld fabric steamer is the most effective in-situ tool. Hold the steamer head approximately 5 to 10 cm away from the vane surface and move it slowly downward in a single continuous pass. The steam loosens embedded dust and light soiling, and the heat refreshes the fabric slightly — reducing odours and restoring a cleaner appearance. Always keep the steamer moving; holding it stationary concentrates moisture and can cause water marking or temporary distortion of the fabric hang.
After steaming, leave the blinds open (vanes spread apart) to allow maximum airflow and faster drying. In humid conditions, run a fan nearby to circulate air and prevent any moisture from sitting in the fabric for extended periods, which can encourage mildew development in the fibre structure.
There are situations where in-situ cleaning is not sufficient and removing the vanes for washing becomes necessary — typically when the fabric has heavy soiling across multiple vanes, noticeable odour, or visible mildew spotting. Removing vertical fabric vanes is straightforward: most systems use a simple clip or hook mechanism at the top of each vane that releases with a gentle squeeze or twist. Label each vane with a small piece of masking tape and a number as you remove them, so they go back in the correct order and orientation.
When machine washing, always check the manufacturer's care label first. Most fabric vertical blind vanes can be washed on a delicate or gentle cycle in cold water using a mild detergent, placed loosely inside a mesh laundry bag to prevent tangling and clip damage. Do not spin dry — remove the vanes while wet and hang them back on the track immediately. The weight of the wet fabric pulls the vanes straight as they dry, preventing creases from forming. Never tumble dry fabric blind vanes, as heat will cause shrinkage and distortion that makes them impossible to rehang correctly.
The most efficient cleaning routine is one that reduces how often deep cleaning is required. A few simple habits meaningfully extend the time between full clean sessions for both hard and fabric blinds.
The fabric or slat surfaces of blinds receive most of the cleaning attention, but the headrail, track, and operating hardware accumulate dust and grime too — and a dirty track affects how smoothly vertical blinds rotate and traverse. For vertical blind tracks, use a vacuum crevice tool to clear dust from inside the track channel, then run a damp cotton swab along the inside of the track to remove compacted debris from the carrier wheels and gliders. A drop of silicone lubricant applied to the track after cleaning keeps the carriers moving smoothly and prevents the jerky, stiff operation that develops when tracks are dry and dusty.
The headrail cover — the decorative housing at the top of the blind — can be wiped down with a damp cloth and mild all-purpose cleaner on both hard and fabric blind installations. Remove the cover if it clips off for easier access to the internal mechanism, and use a soft brush to clear dust from around the worm gear or tilt rod that controls vane rotation. Keeping the mechanical components clean ensures consistent operation and extends the functional life of the blind system well beyond what the vanes alone would last.
How often blinds need cleaning depends heavily on the room they are installed in and the conditions they are exposed to. A practical cleaning schedule prevents both under-cleaning (allowing buildup to become difficult to remove) and over-cleaning (applying unnecessary moisture or mechanical stress to fabric materials).
Keeping to a consistent maintenance schedule — even a light two-minute vacuum pass weekly — is always faster in aggregate than allowing buildup to accumulate to the point where a full deep clean is required. For vertical fabric blinds especially, prevention through regular gentle cleaning is the single most effective strategy for keeping them looking fresh and extending their useful life without the disruption of removal and machine washing.


